这篇文章主要介绍了MySQL备份与恢复之冷备,冷备一般需要定制计划,比如什么时候做备份,每次对哪些数据进行备份等等,对冷备感兴趣的小伙伴们可以参考一下
用一句话概括冷备,就是把数据库服务,比如MySQL,Oracle停下来,然后使用拷贝、打包或者压缩命令对数据目录进行备份。如果数据出现异常,则可以通过备份数据恢复。冷备一般需要定制计划,比如什么时候做备份,每次对哪些数据进行备份等等。但是由于这样的备份占用过多的空间,对大数据量的环境下不一定适合,故生产环境很少使用。
冷备示意图
")
冷备实验
第一步,创建测试数据库,插入测试数据
- mysql> use larrydb;
- Database changed
- mysql> show tables;
- +-------------------+
- | Tables_in_larrydb |
- +-------------------+
- | access |
- +-------------------+
- 1 row in set (0.00 sec)
- mysql> drop table access;
- Query OK, 0 rows affected (0.00 sec)
- mysql> clear
- mysql> show tables;
- Empty set (0.00 sec)
- mysql>
- mysql> create table class(
- -> cid int,
- -> cname varchar(30));
- Query OK, 0 rows affected (0.01 sec)
- mysql> show create table class /G;
- *************************** 1. row ***************************
- Table: class
- Create Table: CREATE TABLE `class` (
- `cid` int(11) DEFAULT NULL,
- `cname` varchar(30) DEFAULT NULL
- ) ENGINE=InnoDB DEFAULT CHARSET=latin1
- 1 row in set (0.00 sec)
- ERROR:
- No query specified
- mysql> create table stu(
- -> sid int,
- -> sname varchar(30),
- -> cid int) engine=myisam;
- Query OK, 0 rows affected (0.00 sec)
- mysql> show create table stu /G;
- *************************** 1. row ***************************
- Table: stu
- Create Table: CREATE TABLE `stu` (
- `sid` int(11) DEFAULT NULL,
- `sname` varchar(30) DEFAULT NULL,
- `cid` int(11) DEFAULT NULL
- ) ENGINE=MyISAM DEFAULT CHARSET=utf8
- 1 row in set (0.00 sec)
- ERROR:
- No query specified
- mysql> insert into class values(1,'linux'),(2,'oracle');
- Query OK, 2 rows affected (0.00 sec)
- Records: 2 Duplicates: 0 Warnings: 0
- mysql> desc class;
- +-------+-------------+------+-----+---------+-------+
- | Field | Type | Null | Key | Default | Extra |
- +-------+-------------+------+-----+---------+-------+
- | cid | int(11) | YES | | NULL | |
- | cname | varchar(30) | YES | | NULL | |
- +-------+-------------+------+-----+---------+-------+
- 2 rows in set (0.00 sec)
- mysql> desc stu;
- +-------+-------------+------+-----+---------+-------+
- | Field | Type | Null | Key | Default | Extra |
- +-------+-------------+------+-----+---------+-------+
- | sid | int(11) | YES | | NULL | |
- | sname | varchar(30) | YES | | NULL | |
- | cid | int(11) | YES | | NULL | |
- +-------+-------------+------+-----+---------+-------+
- 3 rows in set (0.00 sec)
- mysql> insert into stu values(1,'larry01',1),(2,'larry02',2);
- Query OK, 2 rows affected (0.00 sec)
- Records: 2 Duplicates: 0 Warnings: 0
- mysql> select * from stu;
- +------+---------+------+
- | sid | sname | cid |
- +------+---------+------+
- | 1 | larry01 | 1 |
- | 2 | larry02 | 2 |
- +------+---------+------+
第二步,停掉MySQL
- [root@serv01 ~]# /etc/init.d/mysqld stop
- Shutting down MySQL... SUCCESS!
第三步,创建备份目录,并修改拥有者和所属组
- [root@serv01 ~]# mkdir /databackup
- [root@serv01 ~]# chown mysql.mysql /databackup/ -R
- [root@serv01 ~]# ll /databackup/ -d
- drwxr-xr-x. 2 mysql mysql 4096 Sep 10 17:46 /databackup/
- [root@serv01 ~]# cd /databackup/
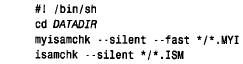
第四步,冷备(使用tar命令)
- [root@serv01 databackup]# tar -cvPzf mysql01.tar.gz
第五步,测试冷备的数据是否正常,我们删除掉data下的所有数据
- [root@serv01 databackup]# rm -rf /usr/local/mysql/data/*
第六步,删除所有数据后数据库不能启动
- [root@serv01 databackup]# /etc/init.d/mysqld start
- Starting MySQL.. ERROR! The server quit without updating PID file (/usr/local/mysql/data/serv01.host.com.pid).
第七步,恢复数据(使用tar命令)
- [root@serv01 databackup]# tar -xvPf mysql01.tar.gz
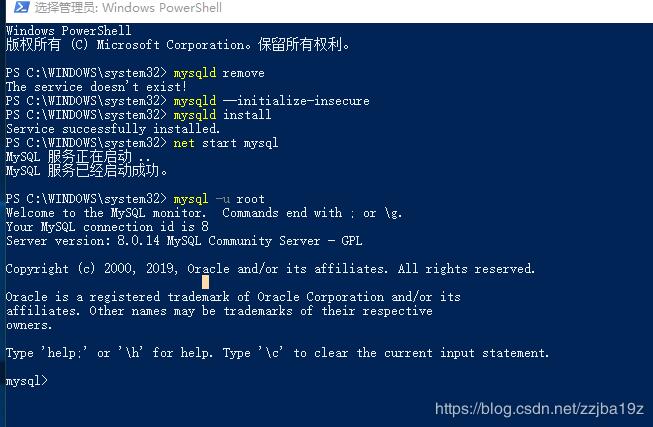
第八步,启动MySQL,然后登录MySQL,查看数据是否丢失,如果数据正常代表冷备成功
- [root@serv01 databackup]# /etc/init.d/mysqld start
- Starting MySQL.. SUCCESS!
- [root@serv01 ~]# mysql
- Welcome to the MySQL monitor. Commands end with ; or /g.
- Your MySQL connection id is 1
- Server version: 5.5.29-log Source distribution
- Copyright (c) 2000, 2012, Oracle and/or its affiliates. All rights reserved.
- Oracle is a registered trademark of Oracle Corporation and/or its
- affiliates. Other names may be trademarks of their respective
- owners.
- Type 'help;' or '/h' for help. Type '/c' to clear the current input statement.
- mysql> use larrydb;
- Database changed
- mysql> select * from class;
- +------+--------+
- | cid | cname |
- +------+--------+
- | 1 | linux |
- | 2 | oracle |
- +------+--------+
- 2 rows in set (0.00 sec)
- mysql> select * from stu;
- +------+---------+------+
- | sid | sname | cid |
- +------+---------+------+
- | 1 | larry01 | 1 |
- | 2 | larry02 | 2 |
- +------+---------+------+
- 2 rows in set (0.00 sec)
以上就是实现MySQL冷备的全部过程,大家对冷备有没有了大概的了解,希望这篇文章可以对大家的学习有所帮助。
新闻热点


疑难解答