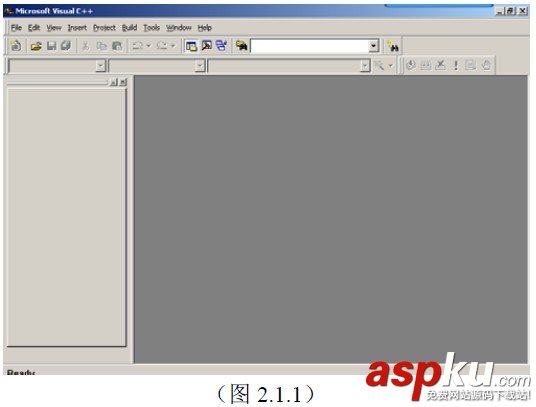
开发环境 vs2010+OPENCV2.4.10
首先,下载最新的Kinect 2 SDK http://www.microsoft.com/en-us/kinectforwindows/develop/downloads-docs.aspx
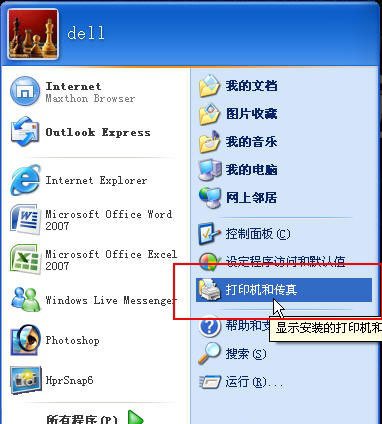
下载之后不要插入Kinect,最好也不用插入除了键盘鼠标以外的其它USB设备,然后安装SDK,安装完成之后插入Kinect,会有安装新设备的提示。安装完成之后可以去“开始”那里找到两个新安装的软件,一个是可以显示Kinect深度图,另外一个软件展示SDK中的各种例子程序。
进入SDK的安装目录,可以找到sample这个文件夹,里面是四种语言编写的例子,其中native是C++的,managed是C#的,还有另外两种语言不熟悉,我就熟悉C++,反正只是试试的,就用C++了。
opencv+kinect .cpp
#include <opencv2/opencv.hpp> #include<iostream>//windows的头文件,必须要,不然NuiApi.h用不了#include <Windows.h>//Kinect for windows 的头文件#include "NuiApi.h" using namespace std;using namespace cv; #include <d3d11.h> //最远距离(mm)const int MAX_DISTANCE = 3500;//最近距离(mm)const int MIN_DISTANCE = 200; const LONG m_depthWidth = 640;const LONG m_depthHeight = 480;const LONG m_colorWidth = 640;const LONG m_colorHeight = 480;const LONG cBytesPerPixel = 4; int main(){ //彩色图像 Mat image_rgb; //深度图像 Mat image_depth; //创建一个MAT image_rgb.create(480,640,CV_8UC3); image_depth.create(480,640,CV_8UC1); //一个KINECT实例指针 INuiSensor* m_pNuiSensor = NULL; if (m_pNuiSensor != NULL) { return 0; } //记录当前连接KINECT的数量(为多连接做准备) int iSensorCount; //获得当前KINECT的数量 HRESULT hr = NuiGetSensorCount(&iSensorCount); //按照序列初始化KINETC实例,这里就连接了一个KINECT,所以没有用到循环 hr = NuiCreateSensorByIndex(iSensorCount - 1, &m_pNuiSensor); //初始化,让其可以接收彩色和深度数据流 hr = m_pNuiSensor->NuiInitialize(NUI_INITIALIZE_FLAG_USES_COLOR | NUI_INITIALIZE_FLAG_USES_DEPTH); //判断是否出错 if (FAILED(hr)) { cout<<"NuiInitialize failed"<<endl; return hr; } //彩色图像获取下一帧事件 HANDLE nextColorFrameEvent = CreateEvent(NULL, TRUE, FALSE, NULL); //彩色图像事件句柄 HANDLE colorStreamHandle = NULL; //深度图像获取下一帧事件 HANDLE nextDepthFrameEvent = CreateEvent(NULL, TRUE, FALSE, NULL); //深度图像事件句柄 HANDLE depthStreamHandle = NULL; //实例打开数据流,这里NUI_IMAGE_TYPE_COLOR表示彩色图像 hr = m_pNuiSensor->NuiImageStreamOpen(NUI_IMAGE_TYPE_COLOR, NUI_IMAGE_RESOLUTION_640x480, 0,2,nextColorFrameEvent,&colorStreamHandle); if( FAILED( hr ) )//判断是否提取正确 { cout<<"Could not open color image stream video"<<endl; m_pNuiSensor->NuiShutdown(); return hr; } //实例打开数据流,这里NUI_IMAGE_TYPE_DEPTH表示深度图像 hr = m_pNuiSensor->NuiImageStreamOpen(NUI_IMAGE_TYPE_DEPTH, NUI_IMAGE_RESOLUTION_640x480, 0,2, nextDepthFrameEvent, &depthStreamHandle); if( FAILED( hr ) )//判断是否提取正确 { cout<<"Could not open color image stream video"<<endl; m_pNuiSensor->NuiShutdown(); return hr; } cv::namedWindow("depth", CV_WINDOW_AUTOSIZE); moveWindow("depth",300,600); cv::namedWindow("colorImage",CV_WINDOW_AUTOSIZE); moveWindow("colorImage",0,200); while (1) { NUI_IMAGE_FRAME pImageFrame_rgb; NUI_IMAGE_FRAME pImageFrame_depth; //无限等待新的彩色数据,等到后返回 if (WaitForSingleObject(nextColorFrameEvent, 0) == 0) { //从刚才打开数据流的流句柄中得到该帧数据,读取到的数据地址存于pImageFrame hr = m_pNuiSensor->NuiImageStreamGetNextFrame(colorStreamHandle, 0, &pImageFrame_rgb); if (FAILED(hr)) { cout<<"Could not get color image"<<endl; m_pNuiSensor->NuiShutdown(); return -1; } INuiFrameTexture *pTexture = pImageFrame_rgb.pFrameTexture; NUI_LOCKED_RECT lockedRect; //提取数据帧到LockedRect,它包括两个数据对象:pitch每行字节数,pBits第一个字节地址 //并锁定数据,这样当我们读数据的时候,kinect就不会去修改它 pTexture->LockRect(0, &lockedRect, NULL, 0); //确认获得的数据是否有效 if (lockedRect.Pitch != 0) { //将数据转换为OpenCV的Mat格式 for (int i = 0; i < image_rgb.rows; i++) { //第i行的指针 uchar *prt = image_rgb.ptr(i); //每个字节代表一个颜色信息,直接使用uchar uchar *pBuffer = (uchar*)(lockedRect.pBits) + i * lockedRect.Pitch; for (int j = 0; j < image_rgb.cols; j++) { prt[3 * j] = pBuffer[4 * j];//内部数据是4个字节,0-1-2是BGR,第4个现在未使用 prt[3 * j + 1] = pBuffer[4 * j + 1]; prt[3 * j + 2] = pBuffer[4 * j + 2]; } } imshow("colorImage",image_rgb); //解除锁定 pTexture->UnlockRect(0); //释放帧 m_pNuiSensor->NuiImageStreamReleaseFrame(colorStreamHandle, &pImageFrame_rgb ); } else { cout<<"Buffer length of received texture is bogus/r/n"<<endl; } BOOL nearMode; INuiFrameTexture* pColorToDepthTexture; //深度图像的处理 if (WaitForSingleObject(nextDepthFrameEvent, INFINITE) == 0) { hr = m_pNuiSensor->NuiImageStreamGetNextFrame(depthStreamHandle, 0 , &pImageFrame_depth); if (FAILED(hr)) { cout<<"Could not get color image"<<endl; NuiShutdown(); return -1; } hr = m_pNuiSensor->NuiImageFrameGetDepthImagePixelFrameTexture( depthStreamHandle, &pImageFrame_depth, &nearMode, &pColorToDepthTexture); INuiFrameTexture *pTexture = pImageFrame_depth.pFrameTexture; NUI_LOCKED_RECT lockedRect; NUI_LOCKED_RECT ColorToDepthLockRect; pTexture->LockRect(0, &lockedRect, NULL, 0); pColorToDepthTexture->LockRect(0,&ColorToDepthLockRect,NULL,0); //归一化 for (int i = 0; i < image_depth.rows; i++) { uchar *prt = image_depth.ptr<uchar>(i); uchar* pBuffer = (uchar*)(lockedRect.pBits) + i * lockedRect.Pitch; //这里需要转换,因为每个深度数据是2个字节,应将BYTE转成USHORT USHORT *pBufferRun = (USHORT*)pBuffer; for (int j = 0; j < image_depth.cols; j++) { //先向,将数据归一化处理,对深度距离在300mm-3500mm范围内的像素,映射到【0—255】内, //超出范围的,都去做是边缘像素 if (pBufferRun[j] << 3 > MAX_DISTANCE) prt[j] = 255; else if(pBufferRun[j] << 3 < MIN_DISTANCE) prt[j] = 0; else prt[j] = (BYTE)(256 * (pBufferRun[j] << 3)/ MAX_DISTANCE); } } imshow("depth", image_depth); //接下来是对齐部分,将前景抠出来 //存放深度点的参数 NUI_DEPTH_IMAGE_POINT* depthPoints = new NUI_DEPTH_IMAGE_POINT[640 * 480]; if (ColorToDepthLockRect.Pitch != 0) { HRESULT hrState = S_OK; //一个能在不同空间坐标转变的类(包括:深度,彩色,骨骼) INuiCoordinateMapper* pMapper; //设置KINECT实例的空间坐标系 hrState = m_pNuiSensor->NuiGetCoordinateMapper(&pMapper); if (FAILED(hrState)) { return hrState; } //重要的一步:从颜色空间映射到深度空间。参数说明: //【参数1】:彩色图像的类型 //【参数2】:彩色图像的分辨率 //【参数3】:深度图像的分辨率 //【参数4】:深度图像的个数 //【参数5】:深度像素点数 //【参数6】:取内存的大小,个数。类型为NUI_DEPTH_IMAGE_PIXEL //【参数7】:存放映射结果点的参数 hrState = pMapper->MapColorFrameToDepthFrame(NUI_IMAGE_TYPE_COLOR, NUI_IMAGE_RESOLUTION_640x480, NUI_IMAGE_RESOLUTION_640x480, 640 * 480, (NUI_DEPTH_IMAGE_PIXEL*)ColorToDepthLockRect.pBits,640 * 480, depthPoints); if (FAILED(hrState)) { return hrState; } //显示的图像 Mat show; show.create(480,640,CV_8UC3); show = 0; for (int i = 0; i < image_rgb.rows; i++) { for (int j = 0; j < image_rgb.cols; j++) { uchar *prt_rgb = image_rgb.ptr(i); uchar *prt_show = show.ptr(i); //在内存中偏移量 long index = i * 640 + j; //从保存了映射坐标的数组中获取点 NUI_DEPTH_IMAGE_POINT depthPointAtIndex = depthPoints[index]; //边界判断 if (depthPointAtIndex.x >= 0 && depthPointAtIndex.x < image_depth.cols && depthPointAtIndex.y >=0 && depthPointAtIndex.y < image_depth.rows) { //深度判断,在MIN_DISTANCE与MAX_DISTANCE之间的当成前景,显示出来 //这个使用也很重要,当使用真正的深度像素点再在深度图像中获取深度值来判断的时候,会出错 if (depthPointAtIndex.depth >= MIN_DISTANCE && depthPointAtIndex.depth <= MAX_DISTANCE) { prt_show[3 * j] = prt_rgb[j * 3]; prt_show[3 * j + 1] = prt_rgb[j * 3 + 1]; prt_show[3 * j + 2] = prt_rgb[j * 3 + 2]; } } } } imshow("show", show); } delete []depthPoints; pTexture->UnlockRect(0); m_pNuiSensor->NuiImageStreamReleaseFrame(depthStreamHandle, &pImageFrame_depth); } else { cout<<"Buffer length of received texture is bogus/r/n"<<endl; } } if (cvWaitKey(20) == 27) break; } return 0;}