这篇文章主要介绍了android编程实现局部界面动态切换的方法,以实例形式较为详细的分析了Android局部切换的布局及功能实现技巧,具有一定参考借鉴价值,需要的朋友可以参考下
本文实例讲述了android编程实现局部界面动态切换的方法。分享给大家供大家参考,具体如下:
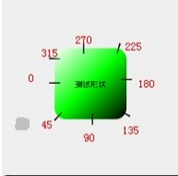
局部界面固定,局部界面可以动态切换。效果如下:


这个效果由3个layout构成
main.xml
- <?xml version="1.0" encoding="utf-8"?>
- <LinearLayout xmlns:android="http://schemas.android.com/apk/res/android"
- android:layout_width="fill_parent"
- android:layout_height="fill_parent"
- android:orientation="horizontal" >
- <LinearLayout
- android:layout_width="fill_parent"
- android:layout_height="fill_parent"
- android:layout_weight="1"
- android:background="@android:color/black" >
- <Button
- android:id="@+id/btnSwitch"
- android:layout_width="wrap_content"
- android:layout_height="wrap_content"
- android:text="switch" />
- <Button
- android:id="@+id/btnScreen"
- android:layout_width="wrap_content"
- android:layout_height="wrap_content"
- android:text="screen" />
- </LinearLayout>
- <LinearLayout
- android:id="@+id/frameSwitch"
- android:layout_width="160dp"
- android:layout_height="fill_parent"
- android:background="@android:color/white" >
- </LinearLayout>
- </LinearLayout>
one.xml
- <?xml version="1.0" encoding="utf-8"?>
- <LinearLayout xmlns:android="http://schemas.android.com/apk/res/android"
- android:layout_width="fill_parent"
- android:layout_height="fill_parent"
- android:background="@color/yellow"
- android:orientation="vertical" >
- <TextView
- android:layout_width="wrap_content"
- android:layout_height="wrap_content"
- android:text="this is linearLayout one" />
- </LinearLayout>
two.xml
- <?xml version="1.0" encoding="utf-8"?>
- <LinearLayout xmlns:android="http://schemas.android.com/apk/res/android"
- android:layout_width="match_parent"
- android:layout_height="match_parent"
- android:orientation="vertical" >
- <TextView
- android:layout_width="wrap_content"
- android:layout_height="wrap_content"
- android:text="this is linearLayout two" />
- <Button
- android:id="@+id/btnSecond"
- android:layout_width="wrap_content"
- android:layout_height="wrap_content"
- android:text="btnSecond" />
- </LinearLayout>
下面是Java代码
- public class ZzzAndroidActivity extends Activity {
- private LinearLayout frameSwitch;
- /** Called when the activity is first created. */
- @Override
- public void onCreate(Bundle savedInstanceState) {
- super.onCreate(savedInstanceState);
- setContentView(R.layout.main);
- frameSwitch = (LinearLayout) findViewById(R.id.frameSwitch);
- Button btnSwitch = (Button) findViewById(R.id.btnSwitch);
- btnSwitch.setOnClickListener(new OnClickListener() {
- boolean boo = false;
- @Override
- public void onClick(View v) {
- boo = !boo;
- if (boo) {
- getViewOne();
- } else {
- getViewSecond();
- }
- }
- });
- /*
- * 是否全屏
- */
- Button btnScreen = (Button) findViewById(R.id.btnScreen);
- btnScreen.setOnClickListener(new OnClickListener() {
- boolean isScreen = false;
- @Override
- public void onClick(View v) {
- isScreen = !isScreen;
- if (isScreen) {
- frameSwitch.setVisibility(android.view.View.GONE);
- } else {
- frameSwitch.setVisibility(android.view.View.VISIBLE);
- }
- }
- });
- }
- public void getViewOne() {
- View viewOne = getLayoutInflater().inflate(R.layout.one, null);
- frameSwitch.removeAllViews();
- frameSwitch.addView(viewOne, LayoutParams.FILL_PARENT,
- LayoutParams.FILL_PARENT);
- }
- public void getViewSecond() {
- View viewSecond = getLayoutInflater().inflate(R.layout.two, null);
- Button btn = (Button) viewSecond.findViewById(R.id.btnSecond);
- btn.setOnClickListener(new OnClickListener() {
- @Override
- public void onClick(View v) {
- Toast.makeText(ZzzAndroidActivity.this, "hello world",
- Toast.LENGTH_LONG).show();
- }
- });
- frameSwitch.removeAllViews();
- frameSwitch.addView(viewSecond, LayoutParams.FILL_PARENT,
- LayoutParams.FILL_PARENT);
- }
- }
希望本文所述对大家Android程序设计有所帮助。
新闻热点


疑难解答