0.
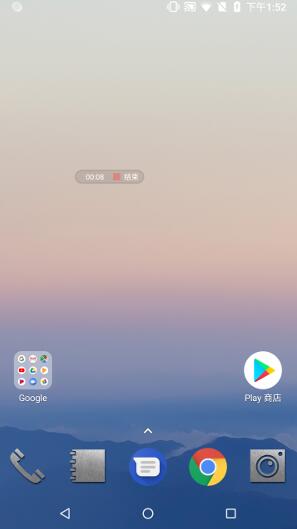
首先话不多说,先上效果图

这个gif把效果放慢了,真是运行时会快很多。
1.分析
看效果,咱们可以分析一下,整个效果有四种状态,第一种就是普通状态,第二种是抖动状态,第三种是隐藏图片和粉碎状态,最后就是粉碎完成的状态,这么一分析就很好搞了,根据不同的状态来写代码。
2.普通状态
首先是普通状态,就是一个图片的展示,这里我们可以看一下setImage方法
fun setImage(resId: Int){ image = BitmapFactory.decodeResource(context.resources, resId, null) preapreCircleColor() postInvalidate()} 可以看到image是一个bitmap,图片来自drawable,这没什么可说的,还有一个就是prepareCircleColor方法,这个方法是用来读取bitmap不同位置的像素颜色,一次来确定粉碎时各个粒子的颜色。
private fun preapreCircleColor(){ image?.let { val step = it.width / Math.sqrt(circleNum.toDouble()) for (i in 0 until it.width step step.toInt()) { for (j in 0 until it.height step step.toInt()) { val color = it.getPixel(i, j) if (circleAttributeList.size > 0) { circleAttributeList[i * 10 + j].color = color } } } }} 3.抖动状态
抖动我们通过一个ValueAnimator来实现
private fun initShakingAnimator(){ shakingAnimator = ValueAnimator.ofInt(shakeCount) shakingAnimator.duration = shakeDuration.toLong() shakingAnimator.addListener(shakingListener) shakingAnimator.addUpdateListener { shakingNum = it.animatedValue as Int postInvalidate() }} shakeCount代表了都动的次数,shakeDuration代表抖动的时间,这两个属性可以通过布局文件来配置。
在onDraw里可以看到drawShakingImage方法
private fun drawshakingImage(canvas: Canvas, centerX: Float, centerY: Float){ image?.let { var offset = 0 offset = if (offset == shakeCount) { 0 } else { if (shakingNum % 2 == 0) shakeOffset else -shakeOffset } canvas.drawBitmap(image, centerX + offset - it.width / 2, centerY + offset - it.height / 2, paint) }} 方法很简单,就是不停的绘制左右偏移的bitmap,当到达最大次数的时候偏移量为0。动画结束后,将状态位置为STATE.FADE
private val shakingListener = object : AnimatorListenerAdapter(){ override fun onAnimationEnd(animation: Animator?) { state = STATE.FADE fadeOutAnimator.start() bombAnimator.start() }} 3.隐藏粉碎状态
动都结束后,就进入隐藏粉碎状态了,这里我们用了两个动画,fadeOutAnimator和bombAnimator,fadeOutAnimator用来隐藏图片,而bombAnimator则是用来绘制粉碎的粒子,关于图片的隐藏就不说了,没什么特别的,这里主要说说粉碎例子的绘制。
首先我们定义一个数据类
data class CircleAttribute(var startVerVelocity: Float, var horVelocity: Float, var orX:Float,var orY:Float, var x: Float, var y: Float, var color: Int,var radius:Float)
这个类用来表示每个粒子起始时竖直方向的速度,水平方向的速度,起始坐标,位置坐标,粒子颜色和半径。
接着在onMeasure结束后,调用了一个方法prepareCircleAttributeList()
private fun prepareCircleAttributeList(){ circleAttributeList.clear() val centerX = measuredWidth.toFloat() / 2 val centerY = measuredHeight.toFloat() / 2 val maxVerVelocity = measuredHeight / bombDuration val maxHorVelocity = measuredWidth / 2 / bombDuration a = maxVerVelocity * 3 / bombDuration for (i in 0 until circleNum) { var color = Color.WHITE val step = Math.sqrt(circleNum.toDouble()).toInt() var x = centerX var y = centerY image?.let { val posXStep=it.width/step val posYStep=it.height/step val topX=centerX-it.width/2 val topY=centerY-it.height/2 val row = i / step val col = i % step color = it.getPixel(row * posXStep, col * posYStep) x=topX+row*posXStep.toFloat() y=topY+col*posYStep.toFloat() } val random = Math.random() val signal = (random * 4).toInt() val startVelocity = (Math.random() * maxVerVelocity).toFloat() val horVelocity = if (signal % 2 == 0) (Math.random() * maxHorVelocity).toFloat() else -(Math.random() * maxHorVelocity).toFloat() val attribute = CircleAttribute(startVelocity, horVelocity, x, y, x, y, color, (Math.random() * 15).toFloat()) circleAttributeList.add(attribute) }} 这个方法就是初始化每个粒子的数据的,最后将数据添加到circleAttributeList。其中a为竖直方向加速度,这里取得比较笼统,就是就是假定三分之一的粒子粉碎时间,最大速度就能减少到0。然后就是确定粒子的位置和颜色,粒子的数量是可以在布局文件控制的,粒子的位置和颜色基本上就是对bitmap的映射,所以如果有100个点,那么bitmap就可以看做10*10的一个粒子阵,每个粒子的位置和颜色是与其相对应的,理解了这个看代码应该就明白了。
启动动画后,接下来就是位置的更新了,看initBombAnimator()方法
private fun initBombAnimator(){ bombAnimator = ValueAnimator.ofFloat(bombDuration) bombAnimator.duration = bombDuration.toLong() bombAnimator.addListener(object : AnimatorListenerAdapter() { override fun onAnimationEnd(animation: Animator?) { super.onAnimationEnd(animation) state = STATE.BOMBED cancelAllAnimators() bombFinishedListener?.onBombFinished() circleAlpha = 0 } }) bombAnimator.addUpdateListener { val time = it.animatedValue as Float for (i in circleAttributeList) { i.x = i.orX + i.horVelocity * time i.y = i.orY - (i.startVerVelocity * time - 0.5f * a * time * time) } if (it.animatedFraction > 0.5) { circleAlpha -= (0.5 * circleAlpha * it.animatedFraction).toInt() } postInvalidate() }} 水平方向的位置就是 i.x = i.orX + i.horVelocity * time, 标准的时间速度
竖直方向的位置就是 i.y = i.orY - (i.startVerVelocity * time - 0.5f * a * time * time) 公式s=v0t+1/2att,初中生都知道。circleAlpha是用来控制粒子的alpha值的。随着动画的进行,不停的进行invalidate,接下来看onDraw方法调用drawCircles方法
private fun drawCircles(canvas: Canvas){ for (i in circleAttributeList) { if (Color.alpha(i.color) == 0) { paint.alpha = 0 } else { paint.color = i.color paint.alpha = circleAlpha } canvas.drawCircle(i.x, i.y, i.radius, paint) }} 这里有一点要注意的是,从bitmap里取到的颜色值是argb格式的,而paint设置的颜色是rgb格式的,所以如果取到的颜色alpha为0,将paint的alpha设置为0.最后动画结束是将状态位置为BOMBED,并调用回调函数
interface OnBombFinishedListener{ fun onBombFinished()} 4.总结
基本上原理就差不多是这些了,最后附上源码地址
github
总结
以上就是这篇文章的全部内容了,希望本文的内容对大家的学习或者工作具有一定的参考学习价值,如果有疑问大家可以留言交流,谢谢大家对VEVB武林网的支持。
注:相关教程知识阅读请移步到Android开发频道。