之前做过的项目里有运用到一个支付场景:用户办理业务时需要输入交易密码,并且可根据平台下发的支付方式进行选择。这与支付宝的密码输入方式十分相似,如果使用Android系统或者第三方软件的键盘,会有密码泄露的风险。因此,大多数的应用软件使用的是自定义的密码输入框及安全键盘。
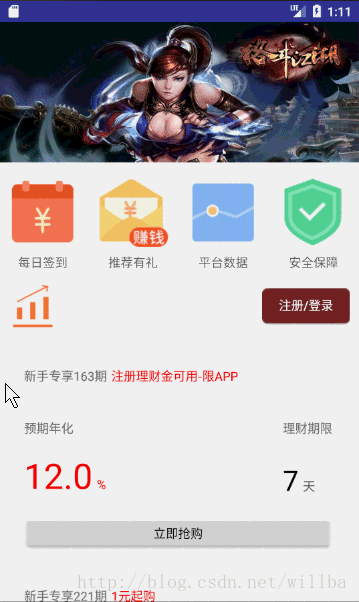
由于密码输入方式需要实现一个从底部弹出的效果,因此总体上决定采用BottomSheetDialog来进行封装,同时为了提高安全性,还应该随机生成键盘上的数字,界面如下图所示:
")
")
首先新建一个PasswordInputView类,将需要使用到的Context对象、支付金额、可支持的支付方式等数据,作为该类构造方法的参数进行传递。下文还将提到该类有一个回调方法,当用户输入的密码满足六位时,可以在回调方法中获取密码并显示出来。PasswordInputView类的构造方法如下所示:
public PasswordInputView(Context context, String payMoney, List<String> payWayList) { this.context = context; this.payMoney = payMoney; this.payWayList = payWayList; payPwdDialog = new BottomSheetDialog(context); View view = LayoutInflater.from(context).inflate(R.layout.dialog_pay_pwd, null, false); initStep1(view); initStep2(view); llyPwdInputView = (LinearLayout) view.findViewById(R.id.lly_pwd_input_view); llyPayWaySelect = (LinearLayout) view.findViewById(R.id.lly_pay_way_select); showStep1(); // 显示第一页 } 因为不能明文显示输入的密码,所以使用“●”来代替每位密码。自定义密码输入框涉及到的自定义属性,主要包括:输入框的大小、颜色、圆角半径以及密码圆点的大小、颜色、半径。因此,自定义属性attrs.xml文件如下所示:
<?xml version="1.0" encoding="utf-8"?> <resources> <declare-styleable name="PasswordEditText"> <attr name="borderWidth" format="dimension"/> <attr name="borderColor" format="color"/> <attr name="borderRadius" format="dimension"/> <attr name="passwordLength" format="integer"/> <attr name="passwordWidth" format="dimension"/> <attr name="passwordColor" format="color"/> <attr name="passwordRadius" format="dimension"/> </declare-styleable> </resources>
接下来就需要去绘制自定义控件了。首先获取自定义属性,然后在onDraw()中进行绘制,代码如下所示:
package com.syd.paypwddialogdemo; import static android.graphics.Paint.ANTI_ALIAS_FLAG; import android.content.Context; import android.content.res.Resources; import android.content.res.TypedArray; import android.graphics.Canvas; import android.graphics.Color; import android.graphics.Paint; import android.graphics.RectF; import android.support.v7.widget.AppCompatEditText; import android.util.AttributeSet; /** * 自定义密码输入框 */ public class PasswordEditText extends AppCompatEditText { private int textLength; private int borderColor; private float borderWidth; private float borderRadius; private int passwordLength; private int passwordColor; private float passwordWidth; private float passwordRadius; private Paint passwordPaint = new Paint(ANTI_ALIAS_FLAG); private Paint borderPaint = new Paint(ANTI_ALIAS_FLAG); private final int defaultContMargin = 5; private final int defaultSplitLineWidth = 3; public PasswordEditText(Context context, AttributeSet attrs) { super(context, attrs); final Resources res = getResources(); final int defaultBorderColor = res.getColor(R.color.colorGray); final float defaultBorderWidth = res.getDimension(R.dimen.default_ev_border_width); final float defaultBorderRadius = res.getDimension(R.dimen.default_ev_border_radius); final int defaultPasswordLength = res.getInteger(R.integer.default_ev_password_length); final int defaultPasswordColor = res.getColor(R.color.colorBlack); final float defaultPasswordWidth = res.getDimension(R.dimen.default_ev_password_width); final float defaultPasswordRadius = res.getDimension(R.dimen.default_ev_password_radius); TypedArray a = context.getTheme().obtainStyledAttributes(attrs, R.styleable.PasswordEditText, 0, 0); try { borderColor = a.getColor(R.styleable.PasswordEditText_borderColor, defaultBorderColor); borderWidth = a.getDimension(R.styleable.PasswordEditText_borderWidth, defaultBorderWidth); borderRadius = a.getDimension(R.styleable.PasswordEditText_borderRadius, defaultBorderRadius); passwordLength = a.getInt(R.styleable.PasswordEditText_passwordLength, defaultPasswordLength); passwordColor = a.getColor(R.styleable.PasswordEditText_passwordColor, defaultPasswordColor); passwordWidth = a.getDimension(R.styleable.PasswordEditText_passwordWidth, defaultPasswordWidth); passwordRadius = a.getDimension(R.styleable.PasswordEditText_passwordRadius, defaultPasswordRadius); } finally { a.recycle(); } borderPaint.setStrokeWidth(borderWidth); borderPaint.setColor(borderColor); passwordPaint.setStrokeWidth(passwordWidth); passwordPaint.setStyle(Paint.Style.FILL); passwordPaint.setColor(passwordColor); } @Override protected void onDraw(Canvas canvas) { int width = getWidth(); int height = getHeight(); RectF rect = new RectF(0, 0, width, height); borderPaint.setColor(borderColor); canvas.drawRoundRect(rect, borderRadius, borderRadius, borderPaint); RectF rectIn = new RectF(rect.left + defaultContMargin, rect.top + defaultContMargin, rect.right - defaultContMargin, rect.bottom - defaultContMargin); borderPaint.setColor(Color.WHITE); canvas.drawRoundRect(rectIn, borderRadius, borderRadius, borderPaint); borderPaint.setColor(borderColor); borderPaint.setStrokeWidth(defaultSplitLineWidth); for (int i = 1; i < passwordLength; i++) { float x = width * i / passwordLength; canvas.drawLine(x, 0, x, height, borderPaint); } float cx, cy = height / 2; float half = width / passwordLength / 2; for (int i = 0; i < textLength; i++) { cx = width * i / passwordLength + half; canvas.drawCircle(cx, cy, passwordWidth, passwordPaint); } } @Override protected void onTextChanged(CharSequence text, int start, int lengthBefore, int lengthAfter) { super.onTextChanged(text, start, lengthBefore, lengthAfter); this.textLength = text.toString().length(); invalidate(); } public int getBorderColor() { return borderColor; } public void setBorderColor(int borderColor) { this.borderColor = borderColor; borderPaint.setColor(borderColor); invalidate(); } public float getBorderWidth() { return borderWidth; } public void setBorderWidth(float borderWidth) { this.borderWidth = borderWidth; borderPaint.setStrokeWidth(borderWidth); invalidate(); } public float getBorderRadius() { return borderRadius; } public void setBorderRadius(float borderRadius) { this.borderRadius = borderRadius; invalidate(); } public int getPasswordLength() { return passwordLength; } public void setPasswordLength(int passwordLength) { this.passwordLength = passwordLength; invalidate(); } public int getPasswordColor() { return passwordColor; } public void setPasswordColor(int passwordColor) { this.passwordColor = passwordColor; passwordPaint.setColor(passwordColor); invalidate(); } public float getPasswordWidth() { return passwordWidth; } public void setPasswordWidth(float passwordWidth) { this.passwordWidth = passwordWidth; passwordPaint.setStrokeWidth(passwordWidth); invalidate(); } public float getPasswordRadius() { return passwordRadius; } public void setPasswordRadius(float passwordRadius) { this.passwordRadius = passwordRadius; invalidate(); } } 安全键盘主要是通过GridView来实现,上文提到为了保证安全性,在安全键盘初始化的时候,应该随机生成键盘上的数字,代码如下所示:
/** * 初始化密码键盘 */ private void initKeyboard() { final int number = 10; int[] keys = new int[number]; for (int i = 0; i < 10; i++) { keys[i] = i; } // 随机生成键盘数字 Random random = new Random(); for (int i = 0; i < number; i++) { int p = random.nextInt(number); int tmp = keys[i]; keys[i] = keys[p]; keys[p] = tmp; } numList = new ArrayList<>(); for (int i = 0; i < 12; i++) { Map<String, String> map = new HashMap<>(); if (i < 9) { map.put("num", String.valueOf(keys[i])); } else if (i == 9) { map.put("num", ""); } else if (i == 10) { map.put("num", String.valueOf(keys[9])); } else if (i == 11) { map.put("num", ""); } numList.add(map); } KeyAdapter keyAdapter = new KeyAdapter(context, numList, handler); gvKeyboard.setAdapter(keyAdapter); } 安全键盘点击事件的处理,是在适配器KeyAdapter的构造方法中传入Handler对象,通过收发消息的方式在PasswordInputView类中处理的,代码如下所示:
holder.btnKey.setOnClickListener(new View.OnClickListener() { @Override public void onClick(View v) { Message msg = new Message(); msg.what = Constants.KEYBOARD_INPUT; msg.obj = position; handler.sendMessage(msg); } }); Handler对象在PasswordInputView类中定义,主要用于处理安全键盘的点击事件,代码如下所示:
Handler handler = new Handler() { @Override public void dispatchMessage(Message msg) { switch (msg.what) { case Constants.KEYBOARD_INPUT: int position = (int) msg.obj; if (position < 11 && position != 9) { // 点击0-9按键 password = etPwd.getText().append(numList.get(position).get("num")).toString(); etPwd.setText(password); } else { if (position == 11) { // 点击退格键 if (!TextUtils.isEmpty(password) && !password.equals("")) { password = etPwd.getText().delete(password.length() - 1, password.length()).toString(); etPwd.setText(password); } } } break; } } }; 为了方便外部获取到用户输入的密码,设计一个回调接口OnPwdInputListener,并在PasswordInputView类中为回调接口创建一个set方法,代码如下所示:
package com.syd.paypwddialogdemo; public interface OnPwdInputListener { void onPwdInput(String password); } 当PasswordEditText控件的TextWatcher对象监听到输入的密码满足六位时,调用回调方法,将密码作为参数进行传递,代码如下所示:
textWatcher = new TextWatcher() { @Override public void afterTextChanged(Editable s) { if (etPwd.getText().length() == 6) { onPwdInputListener.onPwdInput(etPwd.getText().toString()); } } }; etPwd.addTextChangedListener(textWatcher); 在外部调用set方法,创建OnPwdInputListener对象,重写回调方法,即可获取到用户输入的密码,代码如下所示:
pwdInputView.setOnPwdInputListener(new OnPwdInputListener() { @Override public void onPwdInput(String password) { Toast.makeText(MainActivity.this, password, Toast.LENGTH_SHORT).show(); } }); 以上介绍了自定义密码输入框及安全键盘的大致实现思路,对源码感兴趣的小伙伴可以点击下载Demo,查看具体的实现过程及演示效果。
新闻热点


疑难解答