在Android中,使用摄像头拍照一般有两种方法, 一种是调用系统自带的Camera,另一种是自己写一个摄像的界面,本篇文章给大家介绍android开发随手笔记之使用摄像头拍照,感兴趣的朋友一起学习吧
在Android中,使用摄像头拍照一般有两种方法, 一种是调用系统自带的Camera,另一种是自己写一个摄像的界面。
我们要添加如下权限:
- <uses-permission android:name="android.permission.WRITE_EXTERNAL_STORAGE"/>
- <uses-permission android:name="android.permission.CAMERA"/>
1、调用系统Camera
调用系统自带的Camera主要的步骤为:
(1)构造图片存储的路径名
(2)使用Intent启动Camera Activity
(3)将拍摄的图片写入到文件
(4)将图片显示在MainActivity中
首先,构造图片名:
- File filePath = new File(Environment.getExternalStorageDirectory(), "myCamera");
- if(!filePath.exists()){
- filePath.mkdirs();
- }
- fileName = new File(filePath, System.currentTimeMillis() + ".jpg");
- try{
- if(!fileName.exists()){
- fileName.createNewFile();
- }
- }catch (Exception e){
- e.printStackTrace();
- }
然后,启动Camera Activity:
- // intent用来启动系统自带的Camera
- Intent intent = new Intent(MediaStore.ACTION_IMAGE_CAPTURE);
- // 将系统Camera的拍摄结果写入到文件
- intent.putExtra(MediaStore.EXTRA_OUTPUT, Uri.fromFile(fileName));
- // 启动intent对应的Activity,返回默认消息
- startActivityForResult(intent, Activity.DEFAULT_KEYS_DIALER);
最后,将图片显示在MainActivity内。这时,我们通过重载onActivityResult()方法来获取Camera返回的消息。
- @Override
- protected void onActivityResult(int requestCode, int resultCode, Intent data){
- if(requestCode == Activity.DEFAULT_KEYS_DIALER){
- // MainActivity接收Camera返回的消息,然后将已经写入的图片显示在ImageView内
- imageView.setImageURI(Uri.fromFile(fileName));
- }
- }
完整代码为:
- import android.app.Activity;
- import android.content.Intent;
- import android.net.Uri;
- import android.os.Bundle;
- import android.os.Environment;
- import android.provider.MediaStore;
- import android.util.Log;
- import android.view.View;
- import android.widget.Button;
- import android.widget.ImageView;
- import java.io.File;
- public class MainActivity extends Activity {
- private File fileName = null;
- private Button button;
- private ImageView imageView;
- @Override
- protected void onCreate(Bundle savedInstanceState) {
- super.onCreate(savedInstanceState);
- setContentView(R.layout.activity_main);
- button = (Button)findViewById(R.id.button);
- imageView = (ImageView)findViewById(R.id.imageView);
- button.setOnClickListener(new View.OnClickListener() {
- @Override
- public void onClick(View v) {
- File filePath = new File(Environment.getExternalStorageDirectory(), "myCamera");
- if(!filePath.exists()){
- filePath.mkdirs();
- }
- fileName = new File(filePath, System.currentTimeMillis() + ".jpg");
- try{
- if(!fileName.exists()){
- fileName.createNewFile();
- }
- }catch (Exception e){
- e.printStackTrace();
- }
- // intent用来启动系统自带的Camera
- Intent intent = new Intent(MediaStore.ACTION_IMAGE_CAPTURE);
- // 将系统Camera的拍摄结果写入到文件
- intent.putExtra(MediaStore.EXTRA_OUTPUT, Uri.fromFile(fileName));
- // 启动intent对应的Activity,返回默认消息
- startActivityForResult(intent, Activity.DEFAULT_KEYS_DIALER);
- }
- });
- }
- @Override
- protected void onActivityResult(int requestCode, int resultCode, Intent data){
- if(requestCode == Activity.DEFAULT_KEYS_DIALER){
- // MainActivity接收Camera返回的消息,然后将已经写入的图片显示在ImageView内
- imageView.setImageURI(Uri.fromFile(fileName));
- }
- }
- }
2、自己写一个摄像界面
自己写摄像的界面,主要应用了SurfaceView来显示摄像机的画面。然后通过一个Button来保存当前的画面。
同样的,我们需要添加camera和SDCard权限:
- <uses-permission android:name="android.permission.WRITE_EXTERNAL_STORAGE"/>
- <uses-permission android:name="android.permission.CAMERA"/>
首先,我们初始化这个SurfaceView,为这个SurfaceView添加一个对应的Callback即可:
- private SurfaceView surfaceView;
- private SurfaceHolder.Callback callback;
- surfaceView = (SurfaceView)findViewById(R.id.surfaceView);
- callback = new SurfaceHolder.Callback(){
- @Override
- public void surfaceCreated(SurfaceHolder holder) {
- startCamera(); // 用于启动摄像头
- }
- @Override
- public void surfaceChanged(SurfaceHolder holder, int format, int width, int height) {
- }
- @Override
- public void surfaceDestroyed(SurfaceHolder holder) {
- stopCamera(); // 用于关闭摄像头
- }
- };
- surfaceView.getHolder().addCallback(callback); // 将Callback绑定到SurfaceView
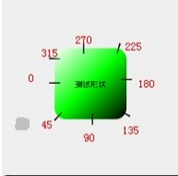
在启动摄像头的时候,首先打开摄像头连接,然后将其图像输出到SurfaceView上,然后启动摄像头预览即可在SurfaceView上显示摄像头的画面,这里的画面和实际画面相差有90度,所以我们需要将图像旋转90度之后才可以和拍摄的物体方向一致。
在关闭摄像头时,只要停止预览,然后释放摄像头资源即可。
- public void startCamera(){
- camera = Camera.open();
- try {
- camera.setPreviewDisplay(surfaceView.getHolder());
- camera.setDisplayOrientation(90);
- camera.startPreview();
- } catch (IOException e) {
- e.printStackTrace();
- }
- }
- public void stopCamera(){
- camera.stopPreview();
- camera.release();
- camera = null;
- }
最后,是将拍摄到的图片保存到SDCard,我们单击Button来拍摄图片,调用Camera.takePicture()方法,其原型为:
- /**
- * Equivalent to takePicture(shutter, raw, null, jpeg).
- *
- * @see #takePicture(ShutterCallback, PictureCallback, PictureCallback, PictureCallback)
- */
- public final void takePicture(ShutterCallback shutter, PictureCallback raw,
- PictureCallback jpeg) {
- takePicture(shutter, raw, null, jpeg);
- }
其中,shutter为按快门瞬间的回调,就是说按快门瞬间会调用ShutterCallback.onShutter()方法。raw是未压缩的图像的回调,即处理图像原始数据的时候会调用PictureCallback.onPictureTaken()方法。jpeg为处理JPEG图片时候的回调,即我们需要将图像数据按照jpg格式保存的时候会调用这个方法,PictureCallback.onPIctureTaken()。这里我们就调用了这个方法,从而将jpg图片存储到SDCard上。
- button.setOnClickListener(new View.OnClickListener() {
- @Override
- public void onClick(View v) {
- camera.takePicture(null, null, new Camera.PictureCallback() {
- @Override
- public void onPictureTaken(byte[] data, Camera camera) {
- try {
- File filePath = new File(Environment.getExternalStorageDirectory(), "myCamera");
- if(!filePath.exists()) {
- filePath.mkdirs();
- }
- File fileName = new File(filePath, System.currentTimeMillis() + ".jpg");
- fileName.createNewFile();
- FileOutputStream fos = new FileOutputStream(fileName);
- fos.write(data);
- fos.flush();
- fos.close();
- } catch (IOException e) {
- e.printStackTrace();
- }
- }
- });
- }
- });
这样,我们便实现了用SurfaceView预览摄像头画面,点击Button将当前预览保存到SDCard中。
完整代码如下:
- import android.app.Activity;
- import android.hardware.Camera;
- import android.os.Bundle;
- import android.os.Environment;
- import android.view.SurfaceHolder;
- import android.view.SurfaceView;
- import android.view.View;
- import android.widget.Button;
- import java.io.File;
- import java.io.FileOutputStream;
- import java.io.IOException;
- public class MainActivity extends Activity {
- private Camera camera;
- private Button button;
- private SurfaceView surfaceView;
- private SurfaceHolder.Callback callback;
- @Override
- protected void onCreate(Bundle savedInstanceState) {
- super.onCreate(savedInstanceState);
- setContentView(R.layout.activity_main);
- button = (Button)findViewById(R.id.button);
- surfaceView = (SurfaceView)findViewById(R.id.surfaceView);
- callback = new SurfaceHolder.Callback(){
- @Override
- public void surfaceCreated(SurfaceHolder holder) {
- startCamera();
- }
- @Override
- public void surfaceChanged(SurfaceHolder holder, int format, int width, int height) {
- }
- @Override
- public void surfaceDestroyed(SurfaceHolder holder) {
- stopCamera();
- }
- };
- surfaceView.getHolder().addCallback(callback);
- button.setOnClickListener(new View.OnClickListener() {
- @Override
- public void onClick(View v) {
- camera.takePicture(null, null, new Camera.PictureCallback() {
- @Override
- public void onPictureTaken(byte[] data, Camera camera) {
- try {
- File filePath = new File(Environment.getExternalStorageDirectory(), "myCamera");
- if(!filePath.exists()) {
- filePath.mkdirs();
- }
- File fileName = new File(filePath, System.currentTimeMillis() + ".jpg");
- fileName.createNewFile();
- FileOutputStream fos = new FileOutputStream(fileName);
- fos.write(data);
- fos.flush();
- fos.close();
- } catch (IOException e) {
- e.printStackTrace();
- }
- }
- });
- }
- });
- }
- public void startCamera(){
- camera = Camera.open();
- try {
- camera.setPreviewDisplay(surfaceView.getHolder());
- camera.setDisplayOrientation(90);
- camera.startPreview();
- } catch (IOException e) {
- e.printStackTrace();
- }
- }
- public void stopCamera(){
- camera.stopPreview();
- camera.release();
- camera = null;
- }
- }
以上所述是本文给大家介绍的关于Android 开发随手笔记之使用摄像头拍照的全部内容,希望大家喜欢。
新闻热点


疑难解答